Sunday, April 6, 2014

Restoration


One of the interesting aspects of miniature painting is looking at things you painted when you first started and realizing how much you have grown in skill.  The only drawback to this is when you have very unique pieces you purchased that you really wish you hadn’t painted so early on.  Forge World items come to mind here.  My number one reason to tell people to wait on Forge World is you don’t want to buy those models until you’re comfortable with your skill level.  The simple fact is as you get better you’ll really be bothered that some of your nicest pieces are not painted to the best of your ability.  Yes you always get better, but I do think there is a key period in those first couple of years where your skill takes off at a dramatic level and after that your improvement is more subtle.  So at least for me I really should have waited on some of those nicer Forge World pieces.

The stripped piece
For the most part I purchased those pieces but never really panted them.  My pack rat tendency to purchase, collect, and not open actually worked to my advantage.  The few things I did paint I didn’t finish and were generally not too far along where I couldn’t go back and retouch them.  In this case I have a Tau Orca which is partially painted.  I have been stripping it here and there as a side project.  In this entry I want to feature the pilot pod from the Orca which had a base coat and was primed.  The priming was done with an aerosol can some time ago.  I stripped that down as best I could for the most part it was fairly clear with small patches of primer here 
 and there.

The interiors
Bottom view
Undersides
 
From the front you can see the highlighted edge built up
I wanted to see how this model would take priming and painting from an airbrush.  I primed it with Vallejo surface primer and used the airbrush to apply the general coats and an edge highlight.  I finished up the finer points by hand.  The interior was airbrushed as well with the details done by hand.  All in all I was very happy with the results and look forward to paining the rest of the Orca in the future.


From the side the green and silver provide accents
From behind and underneath the lime green can be touchy to paint when possible I prefer to airbrush this color as it builds better with an airbrush

The interior I am very happy with the details

Wednesday, February 26, 2014

Forgeworld Relics!


This entry I want to show some of my old Forgeworld pieces that have been sitting around for a long time that I finally painted.  Forgeworld has produced a number of terrain pieces over the years that provide great visual flavor to any board.  I do enjoy the Horus Heresy collection; however I believe that has taken away from the variety of other things Forgeworld used to produce like ruined terrain and other such things.  Every once in a while we see a glimpse of that brilliance.  I would point to the crashed Thunderhawk Realm of Battle board as a recent example.

I have a number of nice Forgeworld pieces sitting around some like the Tau turret and sensor tower can still be purchased and one Imperial moisture condenser are long gone.  I have easily had these pieces probably six years or more sitting around unpainted.  I think part if the reason is I simply couldn’t get the finish I really wanted on these pieces and why pay a premium for a nice piece but not have a matching quality paint job.  I don’t like people painting my stuff so it sat around until a solution presented itself.  That solution was an airbrush.  Airbrushing has allowed me to get great coverage and smooth finishes in the fraction of the time it would take otherwise.  I have also achieved spectacular blending that is exceptionally more difficult to achieve with a conventional brush.  In a future entry I’ll go into more detail about airbrushing but for now it suffice to say that is what has unlocked my ability to get finishes on Forgeworld stuff that are worthy of the models themselves.

 Here you see the Tau turret.  I airbrushed the vast majority of this model.  The airbrush was used to prime, base-coat, highlight and shade.  A brush was used for finer details and finishing.  The fluorescent green was airbrushed as well but I used masking tape to do that without bleeding into the blue.  This is where an airbrush really shines.  This particular color is very thin and needs a number of coats to really show.  You can also get very inconsistent coats with brush strokes showing.  An airbrush works this color to precision and really lets it show.


The Tau sensor tower is same paint job as the turret so there isn’t too much to say.  Here the fluorescent green was in too small of an area to mask for so I did that by hand.  I also modeled the tower as closed as I found the open look awkward.  I might buy another way and model open for some variety.  I do plan to buy more turrets as I love those.
The last piece here is the Imperial moisture condenser.  If you Google this you will find shoots of it painted in a sand color but I really wanted to do something different so I went with a soft pastel blue.  I did the tanks in a vibrant red to set a good contrast and make the piece pop.  I airbrushed the pastel blue, base-coat, highlights and shade.  I also airbrushed the large tank masking off the rest of the piece to get that good finish.  Lots of details on this piece which were picked out by hand.  Washes and pigments were used for finishing touches.
The condenser masked for painting
The control panel is visible above

Tuesday, January 28, 2014

Back Again and 40K Trees!

What Happened?
Well it’s been a little more than a year since my last entry.  I used to wonder how people would let blogs go so long without an update now I know.  LIFE it just happens.  In any case I have been busy and sadly the blog has just been a luxury I couldn’t afford.  My hope is to be more active this year so we will see.   Plus I feel guilty since every time I check on this blog I seem to pick up a few more followers.  Seems the content is good even if the frequency sucks.  In any case even though the blog has been dormant my hobby life has not.  Mainly I focused on knocking how terrain projects.  I had some old objective type pieces from Forgeworld and some old 40K trees I wanted to finish.  I have a Realm of War Table close to done and wanted some nice terrain to put on it.  In this entry I’ll do a review of the 40K Jungle Trees.


40K Jungle Trees
I have a number of sprues of the old 40k Jungle trees.  You see these on occasion in terrain used in White Dwarf and they were also included with the original Tau Battleforce.  They are interesting trees I wasn’t sure how to use.  I have had them sitting in the basement for years.  The large Oval base from GW that came around for flyers is very useful for terrain.  I use this base for a number of items.  In this case I decided to build a small rain forest terrain base.  


The brush I used a thick craft brush
You can see the talus and texture here
I used four trees, also ordered the jungle swarm from the GW and a skeleton from Secret Weapon to provide some variety.  The base was built up with Liquitex Ceramic Stucco.  This is a wonderful texture gel that can be mixed with paint or applied straight and primed and then painted.  I went with the later technique.  I also used talus to provide some rocky features.  Use an old brush or a craft brush you don't paint your minatures with.  The base was airbrushed and then drybrushed.  I also used wash on the tree bases to get deeper shading and wood grain.  I used Vallejo still water for small streams running between the trees.

Older bottle of the stucco the label looks different these days you find it in art and general hobby stores

This is the texture very smooth with a fine grit

I like the results and plan to paint up the rest of the trees in a similar style.  I have enough for about 5 bases which will make for a decent rainforest.  A few points I used a variety of colors to give a more vibrant look versus a uniform color for all and I’m happy with the results.  I glued the trees before I started, next time I will try to fit the trees together without gluing to allow for better access while painting.  In one of the photos you see guardsman legs off to the side.  I used those to create footprints which you can see in the finished picture below off to the left.

Skeleton above and snake from jungle swarm footprints to the left

Rocky formation to the left gives variety to the base
 Next time another project I completed from the Terrain Objective bin.

Saturday, November 24, 2012

Tracking My Work What am I actual Painting!?

NO MORE PLEDGES!

So it’s obviously been longer than a month since our last entry.  Well life has a schedule of its own that doesn’t always accommodate pledges.  At this point what I’ll be doing is posting when I can and trying to keep to once a month when possible. 

Working Smarter Not harder
That said the topic of this post is making the most of your hobby time.  As more and more things pop up I find my hobby time tends to be sporadic.  The problem there is as I spend time doing working here and there I’m not sure I am getting the most out of my time.  An argument might be this is a hobby and any time I spend on the hobby I enjoy is time well spent.  While that might be true I feel I get more enjoyment out of my hobby if I’m working towards accomplishing specific goals.  In this case I have had my Ork Battle Wagon on the table for quite some time and each time I pick it up to paint here and there I feel like I’m not working in the most efficient way possible.

 I began thinking if I mapped out what I wanted to do I believe I could progress through my projects with some better sense of where I am and feel like I am getting more out of my time.  If I’m not getting regular time to work on my hobby then it makes all the more sense to record what I am doing so when I get time I know exactly what I did and what I wanted to do next.  When I pick up a project after not having worked on it in a while I may not remember where I was, so a good amount of time is spent just trying to figure what I was doing and where I should pick up.  I want to avoid that in future.


 To address this issue I created some short forms to help my track things.  One I call the Paint Post which is a sheet I use to summarize the various stages of a project.  

 The other form I call bench notes which are basically memo pads.  The system I have created is I basically track the whole project on the paint post and add bench notes to the project as I plan my next stage of work.  In the example here I decided to finish the right side of the wagon.  


 I also took some pictures beforehand so I could check my progress during a session and after I was done.  My Nikon has a fixed lens so my ability to get in close is limited.  However something is better than nothing.  In this case I identified what I felt still needed to be done on the right side of the wagon wrote it up and set to work.

 
In particular and wanted to do some weathering on the side of the wagon and get some rust and paint chipping on.  I had done some weathering on parts of the wagon already but honestly that was hit and miss I mainly used a technique of trying to paint some random shapes in a dark base and then add metal color inside to create a look of rust and paint chipping away to show the bare metal underneath.  In some cases the sections I painted didn’t feel natural, so I wanted to try something on the right side where I had done no weathering to see if I could finalize what method I wanted to use on the rest of the wagon.  When it comes to weathering there are a few approaches to take like the classic hair spray technique there is also the sponge method which is used either directly or with masking fluid and salt weathering.   

Personally I prefer the sponge technique although I will be trying salt and masking fluid in the near future.  I like make up sponges for this in particular latex.  They have good body and can be ripped to create different sizes and have a more jagged profile to get that random pattern that looks better.

Here you can see my shots after I completed my goals. The difference shows up best between the 2nd Pre-session shot 2nd Post-session and The weathering is subtle and that’s what I like, I emphasize more of an all-around dirty dusty look.  I’m happy with this method of planning my work, I can tell you it took two sessions to get this done and I’m planning on working on the back and the cargo area next.  I also wanted to add some shadow detail to the metal canisters and pick out some other detail areas I thought might need a little touching up.
After its all said and done I have a better grasp of what I did and a better sense of accomplishment.  I think that will also spring board me to painting more often since I have a better idea of what’s getting done.  In this hobby you can have a lot of things to do and in some ways it can become discouraging if you don’t feel you’re making progress. 

Saturday, July 28, 2012

Back from Oblivion!


We are really back this time.  Apologies for the long absence we are just awakening from our great sleep.  Well it was a sleep in terms of the hobby but not life.  In that time away a few things have happened.  New job and new house are the biggest changes.  Life changes like that tend to be consuming so not too much time to tinker around when those things are on your plate.  With that said those things are now settled so now we get to ease back into to some old habits.  Having learned from my experience and wanting to put some real effort into this blog here is the new plan
 
MY PLEDGE
At least one post per month
 
I feel this is a much more realistic goal and one we can meet.  I feel making a pledge is necessary because while this blog was inactive we actually picked up a few followers.  So making a pledge makes me feel a little less guilty for teasing people with the content here.
So for this first full entry I am going to introduce you to our new and improved hobby space/studio!  Before we had a space in an apartment.  With a house we now have a dedicated room (thanks to the generosity of my lovely wife).  Without further ado I introduce you to the Brush and Bolter studio.

 
Here the view doesn’t look too different than the original space we had in the apartment.  However you can see on the side of the model shelf I was able to add bin system to hold assorted paints, pigments, and flock.

 
I really like these bins because they can be removed from these hooks without any trouble and the hooks can accommodate larger bins if you want to mix and match sizes.  I get these bins from the Container Store.

With the additional space of the studio I was able to add a small table to hold more paints, you can see an array wide array of P3 paints.  This also holds my larger Golden Acrylic paints I use for scenery and my texture mediums.  I also store my airbrush and its materials here as well.


This is a big improvement over the old space where a lot of this stuff was stacked under my paint station speaking of which here is what the space looks like now.


The first big difference is the view!  If I so desire I can set and paint and enjoy some natural light.  And if I want to linger in the shadows not a problem as I got some thick thermal drapes to keep out the light and the cold.  You’ll also see I added some extra spot lighting.  The lights in the picture are LEDs that have three settings and provide some extra brightness when needed.  With the additional space provided by the bins and the small table I have more space at the painting station.  So I stretched out some of my paints and rearranged the model I am working on to take advantage of the extra real estate.  That’s my Ork Battlewagon I’m still working on; my hobby life literally went into a deep sleep.
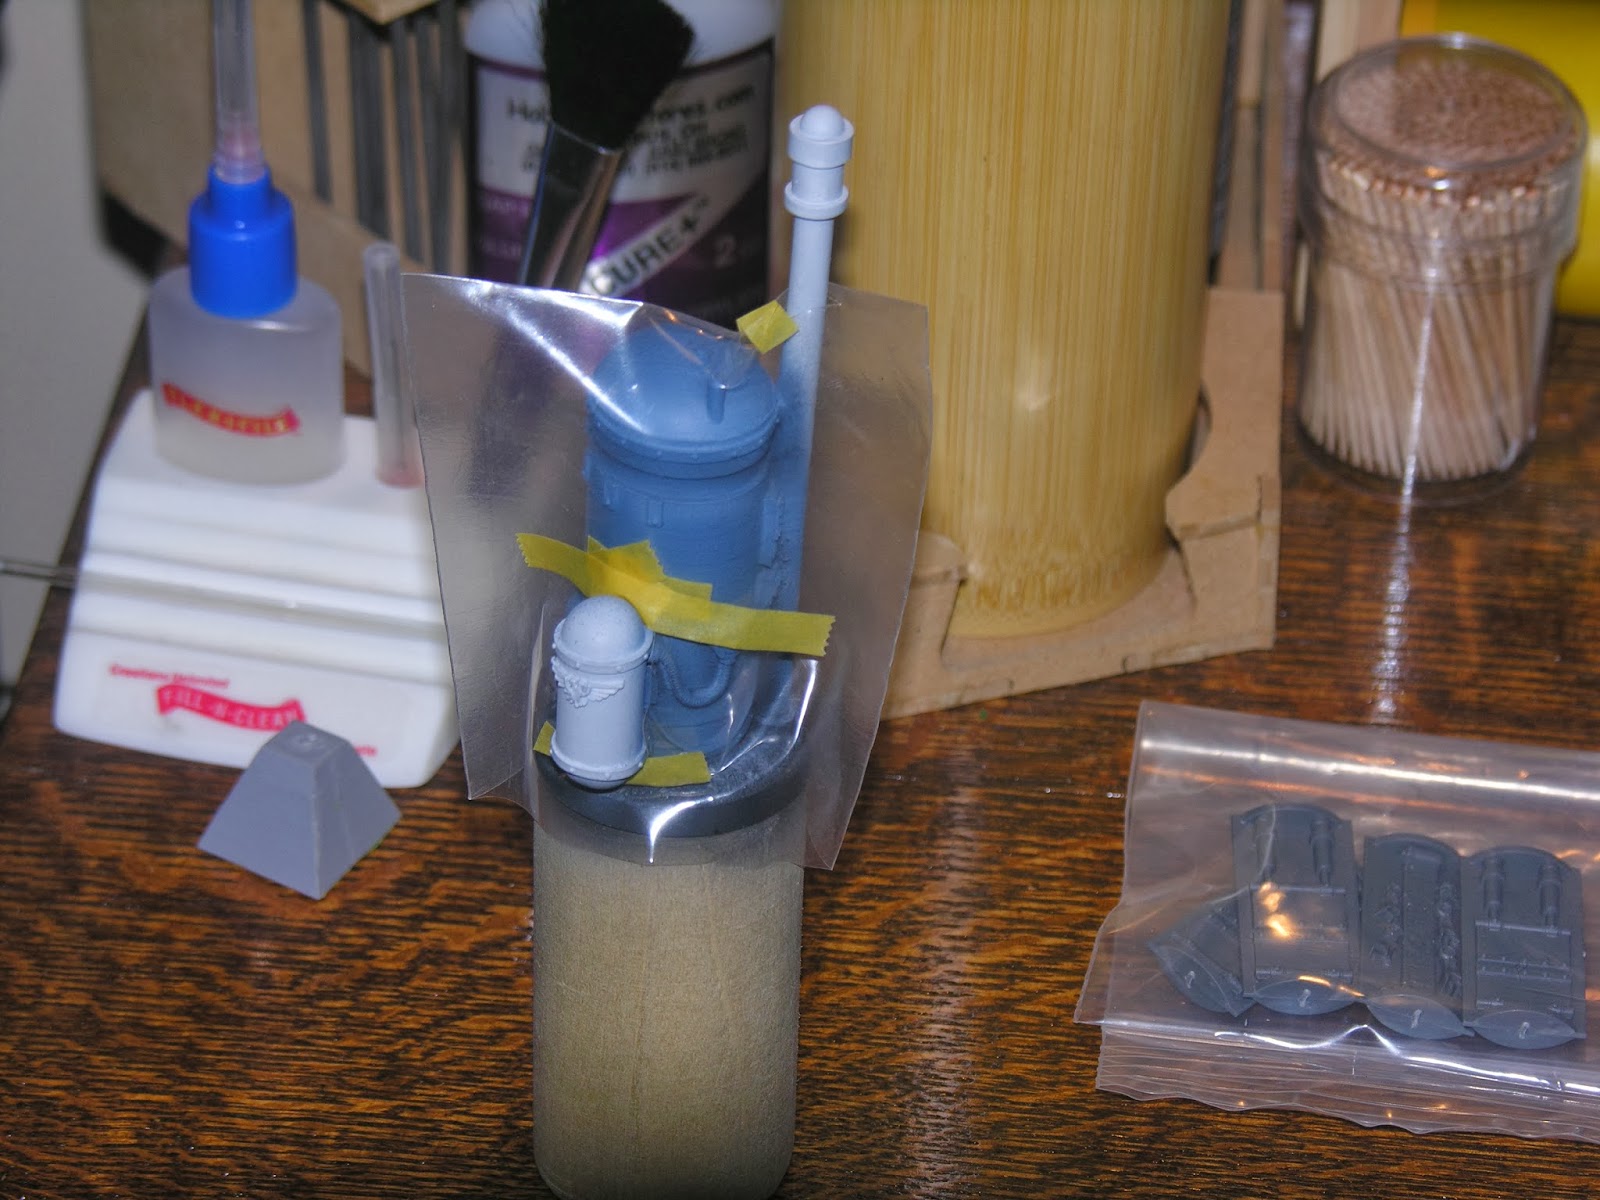
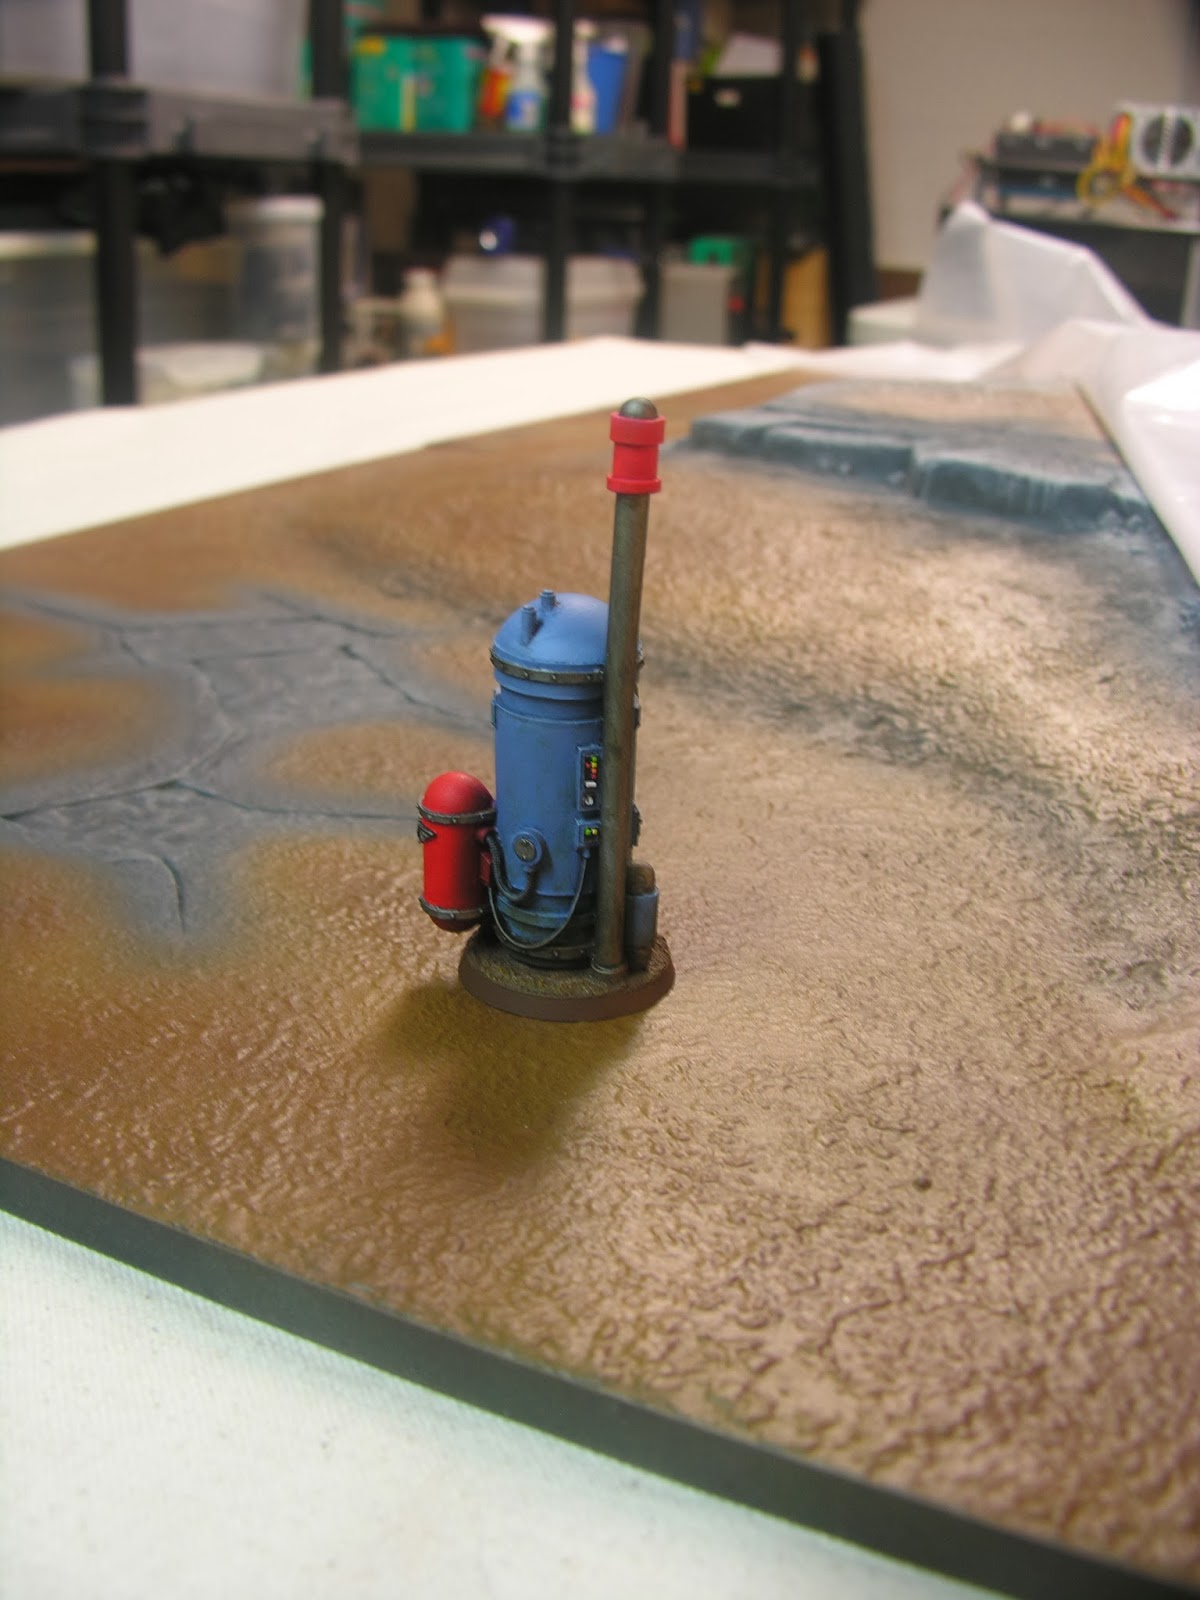

Another new feature I was able to add with the additional space is an assembly station.  Here you see the table with the models I am currently assembling.  I also have a bin on the side to collect parts as I cut them from sprues.  My plan is to add a few bins to handle a larger volume of models.  I have a cutting mat and a plank I use as a work space since I don’t want to destroy the surface of the table I just restored.

 
The plank has a stain on it to keep the nice warm wood tones consistent.  Instead of a standard finish the plank has a wax finish.  This allows me to keep the natural wood texture while providing some protection.  The photos below give you an idea of what the plank looks like.

 
The drawer on the table stores some related hobby papers, info on pants, art invoices (so I remember where and how much I paid for a particular paint, brush, etc.) 

This particular table was sitting in a storage space for about two years.  In conversation with a co-worker who does general maintenance he thought my hobby would give me some transferable skills I could apply to wood work.  Turns out that was true this table was being thrown out when he dropped it off to me.  I don’t have a per say before picture of what this table looked like.  It had a two layers of paint the outermost being an odd pale pink.  Here is the table after sanding in a before and after comparison with another shot of the finished table .


The finishing touches on the space are two storage racks that hold boxed models, dice, old RPG collectables and other assorted gaming items.

The additional space also allowed me to bring in two book shelves to hold rulebooks, fiction and magazines.  All in all the space makes for a great studio/hobby hole.  For the next post I’ll be going into some techniques I’m using to get the most out of my hobby time and keeping my projects organized.

Wednesday, February 9, 2011

We are still here!

Apologies to those of you who follow the blog.  Recently life in the way of work, school and marriage (you have to put in the effort) have complicated my life and taken my time.  I plan to do a full post in a week or so.  For now I wanted to send this message so you all know I am still alive and painting.  Thank you for following the blog and I look forward to giving you something more substantial to read soon!

Tuesday, October 5, 2010

Body Work and Rotating the Tires and Treads

Body Work
Well we are full swing here at the university.  I find myself behind on my blogging schedule.  With that said I apologize for not making my one post every two weeks schedule, however I will say what I lack in quantity I will hope to make up for in quality.  My paint time has been sparse however with my dedicated setup I have been able to make good progress.  Today I will show you where I am with my Bad Moons Battlewagon.

As I have stated many times I am not a fan of the loud bright yellow some people favor by the same token I don't wanted an entirely muted yellow either.  What I have recently worked on is brightening patches of the trucks armor.  I use Vallejo Game Color Sunblast yellow for this.  I load some on a number one brush and lightly let in flow into areas.  I try to stay away from edges so they can keep their dark shading.  On the very edge I use Vallejo Bad Moon Yellow I also use it on the top of bolts it creates a nice pop on the model and allows me to keep the grit below are some shots for you to see.

Not sure how well my pictures captures it but the body shows my technique the turret hasn't yet been treated with the exception of the bottom support struts.  I really like the effect it looks like a real Ork vehicle but still has that loud yellow pop you expect from a Bad Moons vehicle.


Here you see the front of the wagon.  I used the rust ink I mixed up in the last blog and added some of the armor wash recipe created by Les Bursley.  Of the wash recipes offered by Les I used the armor wash the most.  These are thicker inks that can create a glaze like effect.  Another way to play with the recipes is to modify the amount of water and ink.  I have used the self mixed inks and the Vallejo washes for various effects on the wagon.


Here you see one of my favorite features on the wagon.  I got these rockets from Forgeworld.  I painted the rocket with a Vallejo Game Color Yellow Olive.  This rocket highlights one of my habits I like to purchase all avaliable colors because I never know when I might need them.  For this rocket I sat for a bit of time looking through my colors to try and find the right one.  This is also where color swatches come in handy.  With all colors handy it was just a matter of finding the right one and from there the project moved on, no running to the hobby store to find a color.

Tires and Treads

After working on the body I wanted a break and decided to work on one side of tires and treads. Above is the treads with a basic paint of gun metal

Now these are the treads after a wash of armor wash and some forgeworld weathering pigments.  I used a very pure form of Isopropyl alcohol to set the pigments.  If you looking to get a dry crumbling look with pigments it won't happen in my opinion.  Pigments are designed for more stationary models like a diorama.  Once you start moving and handling the model the dry pigments will crumble.  Using the alcohol sets the pigments and they some what dissolve what you get is this streaking look that I think still works.  This is a good video quick video overview of what pigments can do.  Now to get a good textured look of build up I went with a very solid product.
Here you see a dry mud on the treads I used this on the wheels as well.  The product is Black Lava by Vallejo.  This product is like a textured paste that has awesome applications.  When it dries black it's basically primed.  A few blogs have reviewed this product so I won't go into too much more detail, the links are here to the other blogs being Oni, Stahly's Paint Station, and PX40K.  This is a great product you really should get a bottle today.  I used it as well to fill in the skull pits on a realm of battle board but that's for another day.

Below you will see my tires which I painted in similar fashion to the treads.  One of the added touches was to paint a blueish rust around the bolts that was created by mixing dark green and hawk turquoise.  I like the effect and gives a good touch to the tires.

Tire painted flat without highlights or washes

Finished tire with rust and dirt effects


So there you have an update on the battlewagon and some examples of using a great product Vallejo's Black Lava.  By the next entry we should be close to done with the Battlewagon.  Thanks for reading and happy painting.