


Wednesday, February 9, 2011
We are still here!
Apologies to those of you who follow the blog. Recently life in the way of work, school and marriage (you have to put in the effort) have complicated my life and taken my time. I plan to do a full post in a week or so. For now I wanted to send this message so you all know I am still alive and painting. Thank you for following the blog and I look forward to giving you something more substantial to read soon!


Tuesday, October 5, 2010
Body Work and Rotating the Tires and Treads
Body Work
Well we are full swing here at the university. I find myself behind on my blogging schedule. With that said I apologize for not making my one post every two weeks schedule, however I will say what I lack in quantity I will hope to make up for in quality. My paint time has been sparse however with my dedicated setup I have been able to make good progress. Today I will show you where I am with my Bad Moons Battlewagon.
As I have stated many times I am not a fan of the loud bright yellow some people favor by the same token I don't wanted an entirely muted yellow either. What I have recently worked on is brightening patches of the trucks armor. I use Vallejo Game Color Sunblast yellow for this. I load some on a number one brush and lightly let in flow into areas. I try to stay away from edges so they can keep their dark shading. On the very edge I use Vallejo Bad Moon Yellow I also use it on the top of bolts it creates a nice pop on the model and allows me to keep the grit below are some shots for you to see.
 Not sure how well my pictures captures it but the body shows my technique the turret hasn't yet been treated with the exception of the bottom support struts. I really like the effect it looks like a real Ork vehicle but still has that loud yellow pop you expect from a Bad Moons vehicle.
 Here you see the front of the wagon. I used the rust ink I mixed up in the last blog and added some of the armor wash recipe created by Les Bursley. Of the wash recipes offered by Les I used the armor wash the most. These are thicker inks that can create a glaze like effect. Another way to play with the recipes is to modify the amount of water and ink. I have used the self mixed inks and the Vallejo washes for various effects on the wagon.
 Here you see one of my favorite features on the wagon. I got these rockets from Forgeworld. I painted the rocket with a Vallejo Game Color Yellow Olive. This rocket highlights one of my habits I like to purchase all avaliable colors because I never know when I might need them. For this rocket I sat for a bit of time looking through my colors to try and find the right one. This is also where color swatches come in handy. With all colors handy it was just a matter of finding the right one and from there the project moved on, no running to the hobby store to find a color.
Tires and Treads
 After working on the body I wanted a break and decided to work on one side of tires and treads. Above is the treads with a basic paint of gun metal
 Now these are the treads after a wash of armor wash and some forgeworld weathering pigments. I used a very pure form of Isopropyl alcohol to set the pigments. If you looking to get a dry crumbling look with pigments it won't happen in my opinion. Pigments are designed for more stationary models like a diorama. Once you start moving and handling the model the dry pigments will crumble. Using the alcohol sets the pigments and they some what dissolve what you get is this streaking look that I think still works. This is a good video quick video overview of what pigments can do. Now to get a good textured look of build up I went with a very solid product.
 Here you see a dry mud on the treads I used this on the wheels as well. The product is Black Lava by Vallejo. This product is like a textured paste that has awesome applications. When it dries black it's basically primed. A few blogs have reviewed this product so I won't go into too much more detail, the links are here to the other blogs being Oni, Stahly's Paint Station, and PX40K. This is a great product you really should get a bottle today. I used it as well to fill in the skull pits on a realm of battle board but that's for another day.
Below you will see my tires which I painted in similar fashion to the treads. One of the added touches was to paint a blueish rust around the bolts that was created by mixing dark green and hawk turquoise. I like the effect and gives a good touch to the tires.


 So there you have an update on the battlewagon and some examples of using a great product Vallejo's Black Lava. By the next entry we should be close to done with the Battlewagon. Thanks for reading and happy painting.
Well we are full swing here at the university. I find myself behind on my blogging schedule. With that said I apologize for not making my one post every two weeks schedule, however I will say what I lack in quantity I will hope to make up for in quality. My paint time has been sparse however with my dedicated setup I have been able to make good progress. Today I will show you where I am with my Bad Moons Battlewagon.
As I have stated many times I am not a fan of the loud bright yellow some people favor by the same token I don't wanted an entirely muted yellow either. What I have recently worked on is brightening patches of the trucks armor. I use Vallejo Game Color Sunblast yellow for this. I load some on a number one brush and lightly let in flow into areas. I try to stay away from edges so they can keep their dark shading. On the very edge I use Vallejo Bad Moon Yellow I also use it on the top of bolts it creates a nice pop on the model and allows me to keep the grit below are some shots for you to see.


Tires and Treads


Below you will see my tires which I painted in similar fashion to the treads. One of the added touches was to paint a blueish rust around the bolts that was created by mixing dark green and hawk turquoise. I like the effect and gives a good touch to the tires.
 |
| Tire painted flat without highlights or washes |
 |
| Finished tire with rust and dirt effects |


Wednesday, September 15, 2010
Do your own Wash
We are in high swing here at the University so I don't have much time to post but I had time to do a little experimenting with making my own wash. First and foremost I don't have enough art knowledge to do this from scratch on my own. My source was Les Bursley's awesome paint jobs. If you know of Les you will know him from his incredible artwork that is featured on his blog as well as his very strong tutorial's on YouTube. Les is launching an online store where he will be selling miniatures and I for one will make sure to place an order to support him. He has generously shared a lot of good information that has assisted my painting greatly. Les used to sell pigments and inks he made himself. Not too long ago Les shared his recipe for making his inks. This is a classic case of teaching a man to fish.
 I followed Les' instructions exactly and purchased what he used to start my own wash making. I purchased the art materials form Dick Blick and paid $39.54 that got me the Flow Aid a 16oz bottle of Matte Medium and the three inks.
 I also purchased the exact bottles he uses through his links from Container & Packaging Supply. If you have a fetish for containers this place is for you. You can find cheaper bottles in a hobby and craft store but in this case I wanted to try exactly what Les was using to see for myself. I like the quality and weight of these containers and I don't mind spending more for the quality. I purchased 10 of the containers tips and tops. The order only came to $13.70 however there was a $10.00 small order surcharge and $14.93 freight cost ouch. I will be reusing my containers and if I ever order again I will order $50.00 which I believe is the amount that removes the small order charge. I also have the squeeze bottles he uses. I recognized these as Boston Bottles which I purchased at a Dick Blick store near me. Dick Blick has brick and mortar stores but their online selection is cheaper and wider so I usually buy online.
I mixed up the ingredients as Les states in the video and I think the results are great, now these inks do separate as Les states so I added one of my lava rocks for agitation. Les also gives recipes for his other inks and I mixed up a batch of his armor wash. It works great you can see I used it on my Ork Battle wagon and it leaves a great finish that helps shade I think it also will work well on exhausts to give an oxidation effect.
What I love about Les' recipe is it also gives you the basics from which you can experiment yourself. I also have these intense watercolors I saw used at A Gentleman's One and I used that to mix up a yellow wash to help with my Bad Moons.
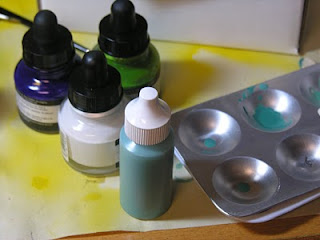 I also adapted a recipe I saw Les use to create a patina wash I plan to do a rust wash as well. In his video he mixes up a small batch with paint but I wanted to make a larger bottle using the inks that I could always have handy and would store well. To create that wash I did 30 drops of olive green 40 drops of white and 30 drops of indigo. I plan to experiment with some other colors put the possibilities are endless. What I really love about this method is the start up is a little costly but in the long run you can mix up your own washes and not have to worry about running out to get a pot when it runs out you also can tweak inks to create whatever you want. So go forth and wash your masses of plastic and metal and happy painting.


 |
| The photo is a little out of focus someone borrowed my tripod the effect is best seen on the bottom of the top can of the battle wagon |
What I love about Les' recipe is it also gives you the basics from which you can experiment yourself. I also have these intense watercolors I saw used at A Gentleman's One and I used that to mix up a yellow wash to help with my Bad Moons.

 |
| You can see the dramatic separation above but this mixes well when you shake it up |

Monday, August 30, 2010
Ork Battlewagon Part One
August tends to be a little hectic here in the higher education business so we are behind on the once a week post pace but not too far. Today I will looking at an Ork Battle wagon I'm painting. I like to do vehicles first in an army to serve as inspiration as well as a guide to theme and color. For this battle wagon I'll be trying some army painter quickshade and using the airbrush.

So like many projects that take on a life of their own so did this battle wagon. First I base coated the model in Vallejo Heavy Goldbrown the equivalent of GW foundation Iyanden Darksun. I featured this in my first blog on Bad Moon Orks
I started with black as the undercoat because I like the shadow effect leaving some of the black for shadow the heavy goldbrown is a good midtone to make the jump to a brighter yellow. I don't favor a white undercoat because then the yellow and the model will just be too bright. In addition when you airbrush coverage is not an issue

Initially I airbrushed the wagon with Golden Diarylide Yellow but after I was done I felt the wagon had too much of an orange tone and the subsequent quickshade would darken the model further and would be too far off yellow. You can see the wonderful coverage with the airbrush.
So not being satisfied I decided to go a shade higher and use Golden Hansa Yellow Medium. I don't like airbrushing a second coat on top of another as it can get sloppy but the airbrush is a precise instrument with a lot of control so you can do a good second coat.

The results were fairly good on close up near some of the bolts you can see some buildup where the paint has pooled but that can easily be shaded.

Here is a larger shot of the model after the second airbrush coat. You can see pooling near the bolts here as well but once again not bad at all.
I then tried the quickshade from army painter you can see the results here this is the soft tone

Army painter quickshade does work as advertised. You can see some wonderful shading here and it collected in the areas where there was some pooling in the airbrush coat and this subsequently created a good shading effect. I felt this was a little light so for the rest of the wagon I went with quickshade strongtone. I wanted more of a dirty look to the vehicle. I preffer to use highlights to pick out the yellow color as opposed to a strong overall yellow coat.
The vehicle is not yet completed but you can see here the result of the strongtone.


The top picture shows where the wagon is currently. I have coated some parts in black and started to add some paint chip areas where the metal would show. The quickshade gave some good shading and also added an overall grime look I wanted.
The results are good with army painter quickshade but their are some concerns. One this is a varnish most of the material I work with will clean up with water you need mineral spirits to clean up quickshade. Quickshade when it dries is a high gloss. I don't like the idea of painting all the parts and then shading the model and varnishing. I need to see the shade to decide on highlights and other features. Now army painter has their own matte varnish they say can be sprayed on and painted on top of. I used this spray varnish and got frosting on my model. Not severe it was in select spots but this was the first time I ever had frosting and it was not a welcomed sight. I was able to cover it up fortunately, but this was a big scare. I used a fleshtone wash and got pretty close to the same results. I will take some pictures of that for a future entry.
This project is ongoing and is a good example of how things can sometimes go astray when your painting but if your patient and take your time you can turn most situations around. I expect to be toiling away on this model for a little while and when it's done you will see the final results. Thanks for reading and happy painting.
Monday, August 16, 2010
Decal Details
Well it has been a little longer then I would like with a post. Currently I am wrestling with an Ork Battle wagon trying to get the Bad Moon yellow I want. However that isn't the topic today. I hope to be done with the truck in a few days so I can post about it and catch up with my one post a week pace. What I am covering today are some handy tools to use with decals. I have seen a great post covering those items at Pit of the Oni. Since I recently put these products to the test I thought it might be useful to post a review here.
We are talking about four products for finishing models created by Microscale Industries. They have a number of products in their line the four I mention here best fit the typical needs of miniature hobbyist. The majority of these products work with decals. And these products works as advertised
 Liquid decal film is is intended to restore old decals. It can also be used to create custom decals. I'm not sure about the custom decal process what I can comment on is the restoration. In my situation I had some great Forgeworld Tau decals from about five years ago. I was pretty sure they were finished. I used a small brush applied the decal film and let the decal dry for 20 minutes. I then wet the decal like I would if it was brand new. The decal came off without a problem and slid right into place.
 Now the area where I wanted to apply the decal was a circular surface at the back of a crisis suit. I was concerned the decal may not be as flexible as I needed to work it into the spot in question. That's where Micro sol comes in handy. First you apply some Micro Sol to the location on the model then place the decal. Lastly apply Micro Sol to the decal when it is placed. The decal will sort of slip into place. Micro Sol softens the decal dramatically so you want to be careful in application as it can move and get distorted.
 Micro Set existentially does the same as Micro Sol. Micro Sol would be the maximum strength and Micro Set regular strength. It is applied in the same way and strengthens adhesion as well as making a decal softer. I would use Micro Set on decals in typical situations and Micro Sol on sections of a model that from a glance look like they would be a challenge to apply correctly.
 Micro Flat is basically a clear flat coat you can apply to surfaces. Its best use is on decals. It flattens the glossy finish of a decal without distorting the color and finish of the decal. Micro Flat can also be used to try and soften the frosting effect you can sometimes get from some finishing varnishes. It won't totally remove the frosting effect it does improve it and depending on how frosted a model is it can salvage a mini. I don't have pictures on this but the blog I cite earlier Pit of Oni does have pictures to show this effect if you search his keywords section.

Above you can see the decal applied to my model. I used Micro Sol, Liquid Decal Film and Micro Flat on the above mini. I don't think the picture does justice to how well these products work. The decal looks perfectly blended and has a wonderful flat finish. I have not seen these products at my local gaming store I have seen them however at a traditional hobby store that does military models. You can also find Microscale products online at Armorcast. Till next time happy painting
We are talking about four products for finishing models created by Microscale Industries. They have a number of products in their line the four I mention here best fit the typical needs of miniature hobbyist. The majority of these products work with decals. And these products works as advertised


Above you can see the decal applied to my model. I used Micro Sol, Liquid Decal Film and Micro Flat on the above mini. I don't think the picture does justice to how well these products work. The decal looks perfectly blended and has a wonderful flat finish. I have not seen these products at my local gaming store I have seen them however at a traditional hobby store that does military models. You can also find Microscale products online at Armorcast. Till next time happy painting
Tuesday, August 3, 2010
Adventures in Priming
A little more time has passed since my last entry then I would have liked. But that's life. I was sidetracked on some computer issues reinstalling software and enjoying some PC gaming. Today I have two things to share. First and foremost I want to talk about my experiences with P3 primer. I have heard many good things about the P3 line of paints. In particular people seem to like their primer. I used the P3 black primer to prime up my 500/750 pt Ork list I mentioned in my last entry.
 I paint my Orks in a Bad Moon's color scheme. However unlike many people who prime them white I still prefer to prime black. I simply don't like the high pitched yellow some people favor. They're Orks they are dirty so there is no way yellow would stay clean with them it would be dingy and dirty and that's the color scheme I go for. As I work up my exact recipe for painting this batch of Orks I will share that with you all. Also for this project I have purchased the dips produced by army painter. I won't be using all the shades I will probably experiment to see what works best but I thought the dips might add a nice overall wash to the Orks. In particular I think it will be great on the vehicles. Note I have no plans to fully dip these miniatures. That method in my mind wastes a lot of the fluid and is just too imprecise for me. I plan to use a crappy brush to put it on and remove excess and see what works.

 What I want to highlight today is the priming. I used P3 and had some interesting results. The primer when I sprayed it came out in an odd sort of flat cone burst. It was narrow and wide. That threw me off as I'm used to a more circular cone like spray. The product actually went on pretty well however given how many things I was spraying which was around 50 miniatures from figures to terrain to vehicles I had to move the can a lot to get the coverage I wanted. The coverage on vehicles was great. On the actual minis I didn't always get the coverage I was looking for. If I just sprayed the minis themselves I probably would have gotten what I needed. I had no instances of a fuzziness, I'm not talking about a warm feeling but the primer build up that happens on a mini when you spray too much primer. This primer goes on very smooth in a sense it has a sort of liquid feel to it. I got some residue on the floor I hadn't seen before and that's how I would describe it like a light liquid. I am looking forward to experimenting a bit more with this primer. However I will say the GW Black primer has always been good so I don't really have need t replace it. What I really need to see is the P3 White primer. It is almost a scientific law at this point that the GW White primer is horrible. I will post additional results as I see them.

Now to address an issue I highlighted earlier. I did not get the coverage on my Ork minis I was looking for. When I start on a miniature I like to have a solid primed coat to start on. I like a uniform black coat as my base. Usually when you spray primer you always end up with some patches of gray or metal underneath. Primer doesn't typical cover that thoroughly. If you try to be that thorough you end up with too much primer. What I used to do was take my minis on the side and hit them with a sloppy coat of thin black before I started painting my primary colors. However what I do these days is airbrush on a black coat. What that does is give me a very smooth coat to work on. The airbrush gives me excellent control over the paint so I get a coat that covers without obscuring the details. An airbrush is capable of much more but this is definitely one of the simpler uses. The GW spray gun would do the same however that tool is very limited beyond that application. I choose to invest in an airbrush because I wanted the tool to grow with me as I experimented. In a future entry I'll do a crash course on the airbrush and what it can do. Below you can see the results in the case of the statues the right one is airbrushed the left is only the primed coat.


To work out my Bad Moon recipe I am painting the battle wagon first. I will post updates so you can see the project move forward. To lay a base for the yellow coat I used Vallejo Heavy Goldbrown the equivalent of GW foundation Iyanden Darksun. I could mix this up for the airbrush but I prefer to brush it on. It gives me time to work with the model and I still find it relaxing to brush.
PUBLIC SERVICE ANNOUNCEMENT
When you work with a color like Heavy Goldbrown make sure you clean your hands well after your done. I ran out after a mid day painting session just splashing my hands. While I was out I went to the bathroom came back and looked down at my hand. Some of that goldbrown got on one of my nails. At the moment I saw that I didn't realize it was paint I thought it was something else. It made for an awkward social moment. With that till next time.


Now to address an issue I highlighted earlier. I did not get the coverage on my Ork minis I was looking for. When I start on a miniature I like to have a solid primed coat to start on. I like a uniform black coat as my base. Usually when you spray primer you always end up with some patches of gray or metal underneath. Primer doesn't typical cover that thoroughly. If you try to be that thorough you end up with too much primer. What I used to do was take my minis on the side and hit them with a sloppy coat of thin black before I started painting my primary colors. However what I do these days is airbrush on a black coat. What that does is give me a very smooth coat to work on. The airbrush gives me excellent control over the paint so I get a coat that covers without obscuring the details. An airbrush is capable of much more but this is definitely one of the simpler uses. The GW spray gun would do the same however that tool is very limited beyond that application. I choose to invest in an airbrush because I wanted the tool to grow with me as I experimented. In a future entry I'll do a crash course on the airbrush and what it can do. Below you can see the results in the case of the statues the right one is airbrushed the left is only the primed coat.


To work out my Bad Moon recipe I am painting the battle wagon first. I will post updates so you can see the project move forward. To lay a base for the yellow coat I used Vallejo Heavy Goldbrown the equivalent of GW foundation Iyanden Darksun. I could mix this up for the airbrush but I prefer to brush it on. It gives me time to work with the model and I still find it relaxing to brush.
PUBLIC SERVICE ANNOUNCEMENT
When you work with a color like Heavy Goldbrown make sure you clean your hands well after your done. I ran out after a mid day painting session just splashing my hands. While I was out I went to the bathroom came back and looked down at my hand. Some of that goldbrown got on one of my nails. At the moment I saw that I didn't realize it was paint I thought it was something else. It made for an awkward social moment. With that till next time.
Tuesday, July 20, 2010
Painting With A Plan
Many miniature war game players fall into two categories. You have gamers and painters. You also have virtuosos out there who are accomplished at both painting a great army and a putting a superb list together. Scanning the blogs out there will tell you where people fall. I think for the best hobby experience you need a mix of both. 40k is pretty much two hobbies one is the painting and the other war gamming.
 Today I am going to offer what I think is the best strategy for painters to get an actual army on the table.
Now most people who focus on painting can get taken with particular models. You see certain pieces you think they look great and you just can't wait to paint them up with your own scheme in mind. What this means is you end up with a hodge podge of minis that don't necessarily translate into an army. Now if this is what you want to do there is nothing wrong with that. However most people at some point do want to play the game. There's nothing wrong with getting a model here and there you want to paint however if you want to actually play that can't be your main method of collection.
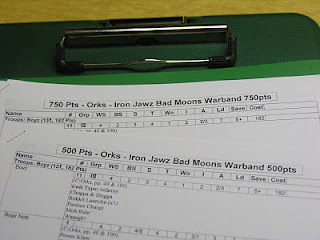 When I decided that I wanted to actually have a viable army I decided on this method. I make two lists in the 500pt and 750pt range. If I have painted minis I can use, I include them in the list. I gather up the models that are going into the list. If there in boxes I pile them together and start to assemble. Painted minis stay on the side as inspiration. Once the army is assembled, I prime, then I paint. I make sure this army has a special place where it stays together until it's finished.
 Now minds wander and sometimes you're just not in the mood so you want to paint something else. That's okay it is a hobby so it should be fun. However I really stress you need to have a space where that army sits so it's a constant reminder of what you want to finish. With my arrangement here the army has a dedicated shelf and I see it all the time so that's my motivation. No minis go anywhere until everyone is painted.
Here are some quick points on why I like this method.

You can play games of 500 and 750 points. These games can be faster and help you pick up the rules and rhythm of the game.
Painting up 500 to 750 points is easier than trying to pound out a 1500 point army (I subscribe to the notion that is the standard point total for 40K) and when you are trying to get started and be motivated it really is a milestone to have a list and a corresponding the army painted in front of you.
Once you have a core of 500 and 750 pts it's easier to add on to reach other playing totals like 1000pts. And as you play with these totals you will learn what your units can and can't do and most of all what no blog can tell you what your style is with your army. Building small like this helps you get acquainted with your army.
Put a list together your comfortable with it does not have to be the greatest list ever the idea is to have an army you can start playing. There is a lot of information on lists out there if you try to research it all before you actually build your army you never will. The point is not to have the best army ever but to have an army you can play.
Chances are if the list isn't working for you adding a unit or two will help, it's highly unlikely that every unit in your list is terrible. Remember it's a game not a real war. If you lose no one dies. We all like to win unless your incredibly insecure you can play a quality game, lose and still have fun. Unless your my wife she's always out for blood.
Well that's my suggestion for getting you from the brush to the bolter. I hope this is helpful and as always comments and thoughts are welcomed.

Now most people who focus on painting can get taken with particular models. You see certain pieces you think they look great and you just can't wait to paint them up with your own scheme in mind. What this means is you end up with a hodge podge of minis that don't necessarily translate into an army. Now if this is what you want to do there is nothing wrong with that. However most people at some point do want to play the game. There's nothing wrong with getting a model here and there you want to paint however if you want to actually play that can't be your main method of collection.


Here are some quick points on why I like this method.

You can play games of 500 and 750 points. These games can be faster and help you pick up the rules and rhythm of the game.
Painting up 500 to 750 points is easier than trying to pound out a 1500 point army (I subscribe to the notion that is the standard point total for 40K) and when you are trying to get started and be motivated it really is a milestone to have a list and a corresponding the army painted in front of you.
Once you have a core of 500 and 750 pts it's easier to add on to reach other playing totals like 1000pts. And as you play with these totals you will learn what your units can and can't do and most of all what no blog can tell you what your style is with your army. Building small like this helps you get acquainted with your army.
Put a list together your comfortable with it does not have to be the greatest list ever the idea is to have an army you can start playing. There is a lot of information on lists out there if you try to research it all before you actually build your army you never will. The point is not to have the best army ever but to have an army you can play.
Chances are if the list isn't working for you adding a unit or two will help, it's highly unlikely that every unit in your list is terrible. Remember it's a game not a real war. If you lose no one dies. We all like to win unless your incredibly insecure you can play a quality game, lose and still have fun. Unless your my wife she's always out for blood.
Well that's my suggestion for getting you from the brush to the bolter. I hope this is helpful and as always comments and thoughts are welcomed.
Subscribe to:
Posts (Atom)


